IMPORTANT: Announcement of Unliminews Closure

Dear customers and partners,
After more than fifteen years of shared commitment and passion, we regret to inform you that Unliminews will cease its activities as of 02/15/2025.

Since our launch in 2009, we have had the pleasure of providing you with reliable and secure access to newsgroups, thereby enriching your exchanges and knowledge. However, with the rapid evolution of technologies and a general decline in interest in newsgroups, we have made the difficult decision to end this venture.

We would like to express our deep gratitude for your trust and loyalty throughout these years. Your support has been essential to our success, and we are sincerely grateful.

If you have any questions or need assistance during this transition period, please do not hesitate to contact us at the following address: support@z51.biz.

We wish you the best for your future projects and hope that our paths may cross again in other contexts.

Thank you again for your trust and support.

Sincerely,
The Unliminews Team

Tutorials

Alt.Binz setup
Start by downloading Alt.Binz

First step: Install

* Double click on the exec. file you just downloaded in order to install Alt.Binz
* A window will open, click on « Next »
* Select « Install »
* Once the install is over, click on "finish"


Second step: Setup * On the main screen, on the upper bar, click on << setup>> and then, at the left on << Servers >>


config-10

* On this screen, in username, enter your login in the first field and your password in the second field. Then click on "next"
* In the sub-menu << Servers Properties >> complete the field << Name >> with: << Unliminews >> and the address field with the address that you can find in the My Account page, do the same for the number of slots allowed.
* Click on the field << Server requires authentication >> and enter your username and password.

config-11

*** Caution! Click on << Add as primary >> before leaving the configuration panel***
* To end, click on "OK" -> Alt.Binz is now configured :)
Grabit setup
Start by downloading GrabIt

First step: Install

* Double click on the exec. file you just downloaded in order to install Grabit
* A window will open, click on "Next"
* Select "I accept the agreement"
* Then click on "Next"
* In the next window, again click on "next" until you get this screen
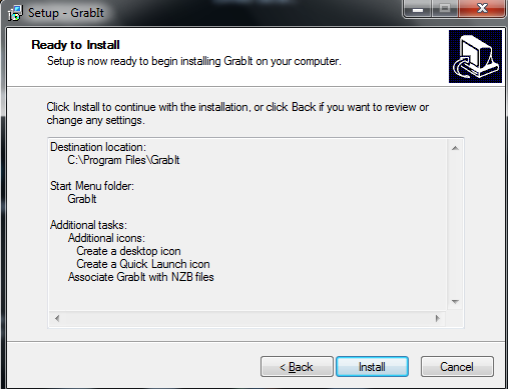

Install-2

* Here click on "Install"
* Once the install is over, clic on "finish"


Second step: Setup

* The setup wizard will open, on the first screen, type the name of your server. (if you don't know it, please consult our FAQ), then click "next"
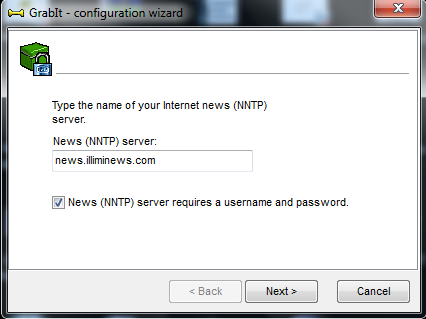

config-0.1

* On this new screen, in username, type your login in the first field, and your password in the second one, then click on "next"
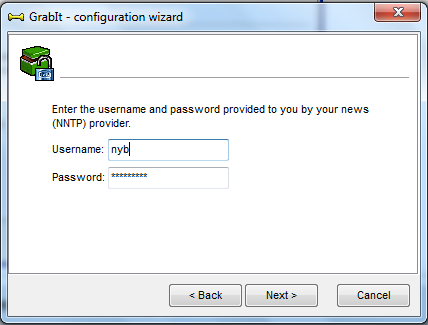

config-1

* Finally click on "finish"
In order to define the utilized port and the number of connections, in Grabit main screen, right clic on "Default server" and clic on "server properties"
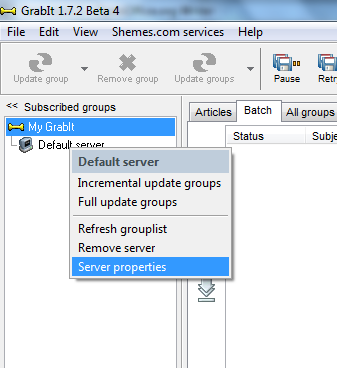

config-0

In the following screen, configure the port (check FAQ) in the appropriate field
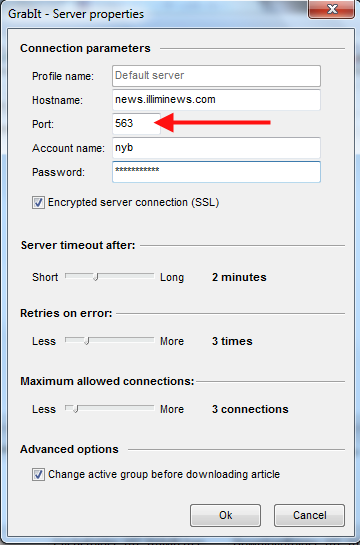

config-3

In the same window, define the number of slots you paid for.
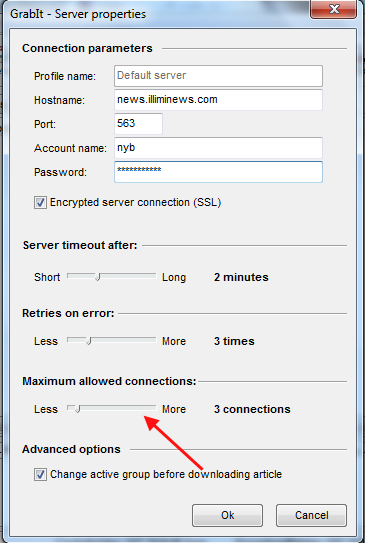

config-6

To finish the install, clic on "OK" -> GrabIt is installed :)
Download on newsgroups
To download on newsgroups you have to use a NZB search engine:
For example:
http://www.binnews.in/

(a list is available on the newsgroups tools page )

In the research field , type the name of the wished file, and select in the drop-down menu the section where launch the search (TV shows, Movies), to launch the search, clic the "BinnewZ" button.


Binnews


In the results, select and copy the name of the file to be downloaded.


 Binnews2

Then on http://www.binsearch.info/ type the name of the file wished (or stick the name of the file found on binnews).


Binsearch

In the result page , tick the case in front of the file you want to download, then clic on "GET NZB".


Binsearch-2

Open the file, and your download will start automatically in your client (Grabit, alt.binz....).
How do i fix/repair my (.rar, r01, 001, 002,...) files?
After downloading a file, sometimes some are corrupted or some part(s) are missing.

In order to be able to use those files, you have to fix them with Quickpar.

Download it here Quickpar and install it

After the software is installed, double-click on the “.par2” file


quickpar

The software automatically finds the file(s) mean while click on « monitor” and “auto repair”.

quickpar-4

Once QUICKPAR is done, you will get a message like : « repair not needed » or « file fixed ».

quickpar-3

Enjoy, your file is ready to go!! :D


In case Quickpar fails to fix your files, it might mean that it is too damaged or that is misses too many files to repair it.
Try to re-download the file or find another source.
Valid CSS 2.1
Valid XHTML 1.0 Transitional